Zoom Audio-Remote Work Tips for a Zoom Meeting
Do you want better Zoom Audio? Well, in this post I’m talking about remote work tips for a zoom meeting so that you can hear and communicate more effectively on your next zoom call. Coming up!
Please SUBSCRIBE to our YouTube channel for weekly videos! The video link is at the end of this post.
Hi, I’m Dr. Derek, audiologist with ProFitHearing.com bringing you the best insight into today’s latest hearing aids and audio technology to improve your life! If you have concerns about your hearing, always consult with your local physician or audiologist.
Today, I’m talking about how you can improve the audio & video quality of your Zoom call for better communication. I know a lot of us are working from home right now and may be learning how to use video conferencing software for the first time. Well, there are several tips and equipment options I will share today that can dramatically improve your overall audio & video quality. This is especially important if you have hearing loss and struggle with communication.
I will leave links to all the products I discuss today below, so you can check them out for yourself.
Understanding speech on a zoom call can be much easier if you follow these 5 steps. I’ll also walk you through the specific Zoom software settings that you’ll need at the end of this post.
1. Quiet, well lit environment
Find a quiet environment for your zoom call. Use a room that is away from other people and distractions if possible. Being in a quiet environment is especially important if you have to use a laptop without headphones. If you must be on your zoom call in an area with other people, at least try to have your back facing the wall. That way others on the call will not be able to see whatever may be going on around you and be distracted by it. You can also use a virtual background in the software to remove whatever is behind you.
Also, make sure you turn on a light or sit near a window so that light can shine onto your face. Having light behind you or off to the side will create large shadows on your face and lead to a poor image quality on your camera. Having good image quality means it’s easier to read lips and access visual cues for improved speech understanding.
2. Headphones
Always use quality headphones if possible. Start with whatever you may have at home. Do you have Apple earphones or a headphone/mic combo that came with your phone? Wearing something like this will not only make it easier to hear and understand other people on your Zoom call but also having a microphone close to your mouth will dramatically improve the intelligibility of your voice for others on the call.
So, make sure your headphones have a built in mic. This is called a TRRS audio plug which stands for Tip Ring Ring Sleeve, and it has three lines on it. This type of connection allows for stereo audio and a mic.
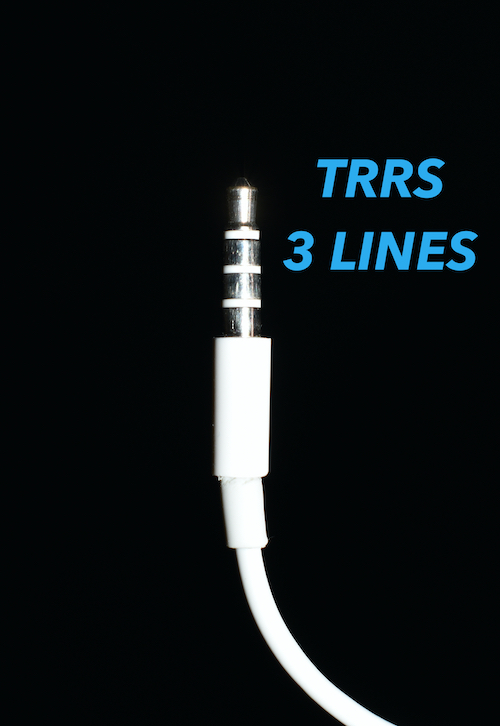
Built in Microphone
If your headphones have just two lines, that means there is no microphone input. If your headphones do not include a mic, your laptop computer will likely use its internal microphone to pick up your voice but the sound quality will not be as good as an external microphone that’s close to your mouth.
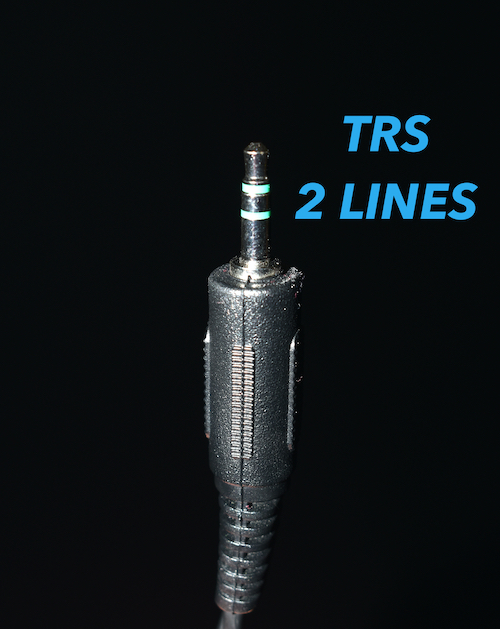
No Microphone
While basic headphones with a mic will improve your zoom audio, there are other headphones that will improve the sound even more. These include passive or active noise canceling headphones. Passive noise canceling means the headphones cover the ear or seal inside the ear enough to effectively block out the extra noise in your environment. Active noise cancelling headphones also cover or seal inside the ear but add in electronics that produce sounds to help cancel out even more noise.
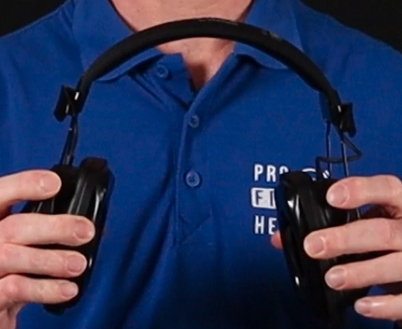
Passive Noise Cancelling
So, I have an example of some passive noise cancelling headphones. These are the Howard Leight Sync headphones. They’re basically like earmuffs with an audio adapter, so this blocks out the sounds around me. It has a very tight seal against my head. I can plug this into my computer or whatever I’m listening to, and I hear it a lot better. I don’t hear the background noise quite as much.
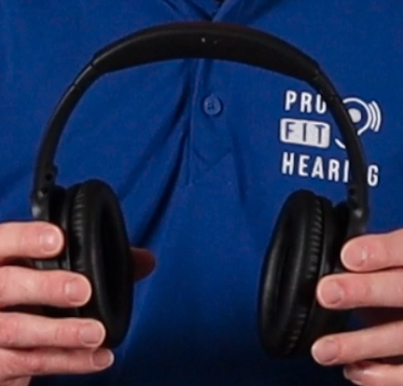
Active Noise Cancelling
Bose Noise Cancelling headphones are an example of active noise cancellation. I will have a review video about these headphones coming soon and will leave a link once it’s available. If your headphones have a mic and are connected to your computer by bluetooth, they will transmit both your voice and the zoom audio.
3. External Microphone
So, I recommend using a headphone/mic combo to not only improve what you hear but to also make your voice much easier to understand. If you are looking for a more professional setup, you can go one step further and buy a stand alone external mic to use with your zoom call. It can be something like this AKG c214 large diaphragm condenser mic or other broadcast quality mic. However, this type of microphone will require an additional sound interface like this Focusrite Scarlett USB interface to plug into your computer. If you want an easy to use mic, look for a USB microphone. I know the Blue Yeti USB mic is very popular with podcasters, and it’s an easy way to significantly improve the quality of your voice, for others on the call, at a reasonable price.

AKG C214
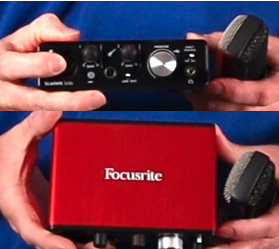
Focusrite Scarlett USB Interface
4. Camera
When it comes to cameras, most of us will just use the included webcam on our laptops. The quality is usually adequate but just make sure the camera is clean. No one likes a blurry image. Also, put your webcam at eye level if possible. If you want a professional setup, I recommend the Elgato Cam Link 4k. This adapter will allow you to take any camera with HDMI output and plug it into your laptop via USB. You can then replace the default webcam with your external camera for professional image quality. Image quality can be just as important for zoom calls as audio is. Being able to clearly see the person speak will help improve your ability to understand them, especially if you have hearing loss or difficulty with communication.
I will leave links to all the products I discuss today below, so you can check them out for yourself.
5. Zoom Audio & Video Settings
OK, so let’s take a look at specific software settings that you can use today to improve the quality of your Zoom meeting video & audio for better communication. You can also review your video and audio settings whenever you join a meeting.
Please refer to the video at the end of this post beginning at 7:04 to follow along with this software tutorial.
Audio
The first thing you want to do is download and install the zoom app on your computer. When you first open Zoom, you’ll see a little box. You want to go to the preferences tab. Under preferences you’ll see that the first thing is the microphone input level. My microphone input level is still in the green. I’m using my external mic with the Scarlett Solo USB interface.
I adjusted my microphone input level on my interface, so I’ll just have the input level set at a fixed setting. I’ve already checked this on my external device, so I don’t really need to worry about it. If you are using another kind of microphone like a USB microphone, you would select it from this menu here. In this case I have a laptop, so I have a built-in microphone selected right now. You can see my voice level input and can have it automatically adjust your microphone level.
You also have the option to join audio by computer whenever you join the meeting so that you can hear the participants as soon as you join the meeting. You can mute your microphone when you join the meeting by default and then press and hold the space key to temporarily unmute yourself. I like to use this feature so that by default my microphone is muted. Then, I press and hold on the space key to unmute my microphone to send my voice out to all the other participants. If someone is presenting a topic or having a discussion, they won’t be distracted by background noise from all the other participants.
Advanced Zoom Audio Settings
The other thing to consider is the zoom audio advanced settings tab. If I hover above the Enable Original Sound option, you can see that it turns off audio enhancements such as echo cancellation and noise suppression. The sound quality is not as processed with this feature. Otherwise, the computer will do everything automatically and suppress background noise and echos for you. If you and everyone else on the call wants to have a better sound quality for your voices, I encourage you to select the Enable Original Sound option. When you are on the call, you will see a little box pop up that allows you enable original sound.
Video
We also want to consider video. Under the video tab, we have the ability to select which camera we want to use. In this case I have my FaceTime HD camera which is just the embedded webcam on my laptop. You can also have the Cam Link 4K listed for an external camera. I can select between whichever camera feed I want to use. Enabling HD gives you a better quality of your video that’s being sent out. Touch up my Appearance might be something worth trying if you don’t like the quality of your video.
I like turning off my video when joining a meeting. When I first join the call, I have to enable my video. That way I know I’m ready to send out my image to everybody on the call. If you’re getting set up when joining a phone call and are not ready to be seen by everybody, this feature might be something you want to use. Something that’s also very handy is the video preview dialog box. Whenever you go to join a meeting, you’ll see your image so you can adjust your image quality before everybody sees it.
Accessibility
The last thing I would look at would be the accessibility tab. This is where you can adjust the appearance of your subtitles. If you want to make your subtitles larger and easier to see, this is where you would do it. Closed captioning can significantly improve communication for hearing impaired zoom meeting members, so you definitely want to use this functionality if possible. You can skip this option if no one on the call needs it.
To use closed captioning, the meeting host must activate it. If you’re the host, you must first sign into your account. Go to account management, then account settings, and the go to the meeting tab. There you can click the enable closed caption. Meeting participants can then click on the closed captioning option on the bottom of the screen to activate closed captioning.
You need to make sure to select a participant in the meeting that can manually type in the text for closed captioning in real time, or you can use a third-party transcription service. For more information on closed captioning and third-party transcription set up, check out the video and help center guide from Zoom below. Once you’ve made your changes, close the box and join your meeting.
Zoom Closed Caption
Third Party Closed Captioning
Question of the Day
So for today’s question, have you tried any of these remote work tips for your zoom meeting? If so, did you notice the sound or video improve and was it helpful for communicating with your group? I’d love to know your thoughts, so please comment below and let’s connect.
Remember to connect with Pro Fit Hearing on social media. Be a part of the Pro Fit Hearing community!
If you are interested in hearing aids, click on the link free ebook for my FREE ebook, “How To Buy Hearing Aids”. Know what to ask your audiologist or hearing aid dispenser so that your hearing aids are easy to use and have all the features you’re looking for.
Remember, Pro Fit Hearing brings you the best insight into today’s latest hearing aids and audio technology to improve your life! If you have concerns about your hearing, always consult with your local physician or audiologist.
-Dr. Derek
FEATURED PRODUCTS
- Apple Earpods
- Howard Leight Sync
- Bose QC 35
- AKG C214
- Focusrite Scarlett Solo USB interface
- Blue Yeti
- ElGato Cam Link 4k
